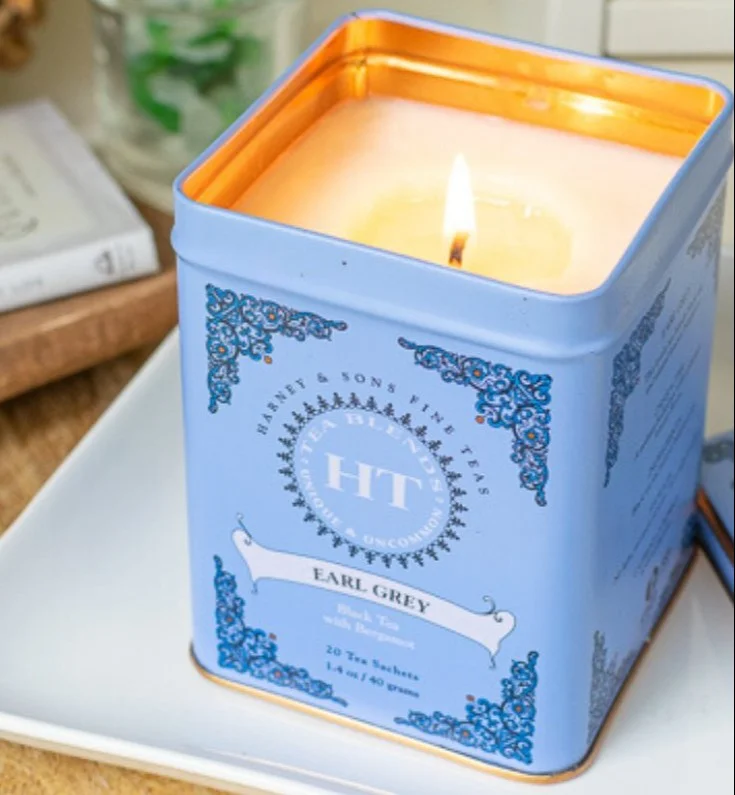

Create Beautiful Hand-Poured Soy Candles in Reused Tea Tins
Making your own candles can be a fun, creative, and environmentally friendly project! By repurposing old tea tins, you not only create stunning handmade gifts but also contribute to reducing waste. This guide will take you through crafting delightful hand-poured soy candles in recycled tea tins. Let’s dive into the art of candle making and create something beautiful together!
Why You Will Love This Recipe
- Eco-Friendly: Reusing tea tins helps reduce waste and gives new life to items that would otherwise be discarded.
- Customizable: You can personalize your candles with different scents, colors, and decorations.
- Unique Gifts: Handmade candles make thoughtful gifts for weddings, birthdays, and other occasions.
- Easy to Make: This project is beginner-friendly and requires minimal equipment.
Ingredients
For this candle-making project, you’ll need:
- Soy wax: 1 pound (approximately 16 ounces)
- Fragrance oil: 1 ounce (optional, adjust to your scent preference)
- Dye chips: A few small chips (optional, for coloring)
- Cotton wicks: Depending on your tin size (generally 1-3 wicks)
Note:
Ensure that your fragrance and dye are specifically formulated for candles.
Equipment
You will also require the following equipment:
- Double boiler or a microwave-safe bowl: For melting wax
- Thermometer: To monitor wax temperature
- Stirring utensil: A wooden spoon or silicone spatula
- Pouring pitcher: For transferring the melted wax
- Tea tins: Cleaned and dried
- Wick holder: Can be a chopstick or pencil to hold the wick in place
- Scale: For accurate measurement of wax and fragrance
- Paper towels: For cleanup
Step-by-Step Instructions
Preparation Time: 15 minutes
Making Time: 1 hour
Yield: Approximately 3-4 tea tins of candles
Step 1: Prepare Your Workspace
- Clean and set up your workspace to make sure it is flat and free from clutter. Lay down paper towels for easy cleanup.
Step 2: Measure the Wax
- Weigh out 1 pound of soy wax. For accurate measurement, use a kitchen scale.
Step 3: Melt the Wax
- Using Double Boiler: Fill the bottom pot with water and bring it to a gentle simmer. Place the wax in the top pot and heat. Stir occasionally until fully melted.
- Using Microwave: Place the wax in a microwave-safe bowl, heating it in 30-second intervals, stirring in between, until melted.
Step 4: Check the Temperature
- Use a thermometer to check the wax temperature. You should aim to pour at around 180°F for optimal fragrance retention.
Step 5: Add Fragrance and Dye
- Once the wax is melted and at the right temperature, remove it from heat. Add your fragrance oil (1 ounce per pound of wax) and any dye chips, stirring thoroughly to combine.
Step 6: Prepare the Wicks
- Attach the wick to the bottom of the tea tin using a little melted wax. Hold it in place with a wick holder across the top until the wax sets.
Step 7: Pour the Wax
- Carefully pour the melted wax into the prepared tins, leaving about 1/4 inch of space from the top.
Step 8: Secure the Wicks
- Adjust the wicks again if needed to ensure they are centered.
Step 9: Let Them Cool
- Allow your candles to cool completely at room temperature. This process usually takes 1-2 hours.
Step 10: Trim the Wicks
- Once the candles are set, trim the wicks to about 1/4 inch above the wax surface.
Tips for Success
- Test Wicks First: If you’re unsure about wick size, experiment with different wick sizes in a small sample first.
- Cool Slowly: Avoid moving the tins around while cooling to prevent uneven surfaces or cracking.
Common Mistakes to Avoid
- Overheating Wax: Never exceed 200°F when melting your wax, as it can degrade the wax quality.
- Not Using Enough Fragrance: Ensure to follow the recommended fragrance load for a satisfying scent throw.
- Pouring Too Hot: Pouring at too high a temperature can result in a poor bond with the wick.
Variations and Customization Ideas
- Scent Combinations: Mix different fragrance oils for a unique scent profile.
- Colorful Layers: Pour different colors in layers for a striped candle effect.
- Decorations: Add dried flowers or herbs to the wax before it sets for an aesthetic touch.
Storage and Shelf Life
Store your soy candles in a cool, dry place away from direct sunlight. Properly stored, they can last up to 6 months or longer without losing scent or quality.
Safety Tips
- Always work in a well-ventilated area when melting wax and adding fragrance oils.
- Use heat-resistant gloves if needed when handling hot containers.
- Keep candles away from children and pets. Never leave burning candles unattended.
Frequently Asked Questions
Can I use other types of wax?
Yes, you can use paraffin or beeswax, but this guide specifically focuses on soy wax due to its eco-friendliness and easy accessibility.
How do I know what wick to use?
Wick size depends on the diameter of your candle container and wax type. Check resources or guides specifically about wick sizing for your chosen materials.
Can I reuse scented candles?
If you want to reuse an existing candle container, ensure it is thoroughly cleaned from any remaining wax and scent.
Why does my candle have a hole in the top?
This can happen due to rapid cooling or if the wax was poured at too high a temperature. You can fix this with a heat gun to smoothen the surface.
What should I do if my candle doesn’t smell strong enough?
Consider adjusting the fragrance load but beware of oil limitations. It’s vital to balance scent strength without compromising safety.
How can I make my soy candles burn longer?
Use high-quality soy wax, the correct wick, and keep the wick trimmed to 1/4 inch for a longer, more even burn.
Conclusion
Creating your own hand-poured soy candles in reused tea tins is a fulfilling and eco-friendly craft. Not only do you end up with beautiful homemade gifts, but you also play a part in reducing waste in our environment. So, gather your materials, follow these simple steps, and light up your home with your very own creations. Enjoy the process and feel free to get creative as you make each candle your own! Happy crafting!