
Create Your Own Herb-Infused Soap: A Step-by-Step Guide
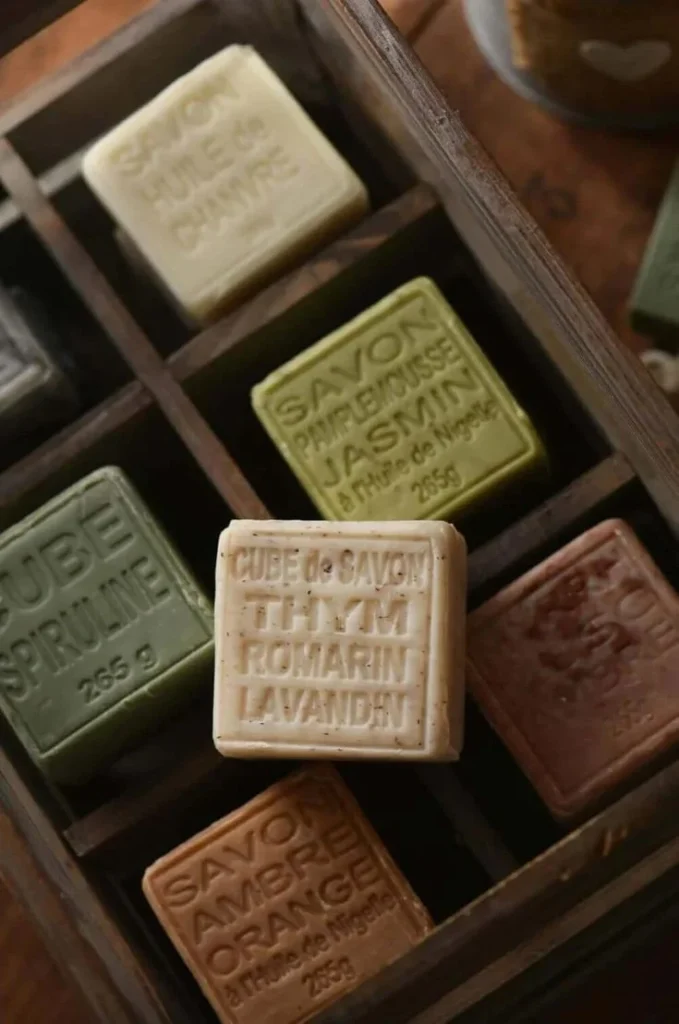
An aromatic blend of thyme, rosemary, and lavender-infused soap can transform your daily cleansing routine into a refreshing experience reminiscent of walking through sun-warmed herb gardens. Not only does it smell incredible, but it also offers gentle exfoliation thanks to the addition of heather flower and is enriched with nourishing grapeseed oil. This DIY project is perfect for beginners looking to explore the art of homemade soap—let’s dive into making this delightful French inspired soap cube!
Why You Will Love This Recipe
Creating your own herb-infused soap at home is a rewarding process that allows you to customize scents, textures, and even colors. Making soap offers practical benefits as you’ll have a luxurious product without the harsh chemicals often found in commercial options. This recipe blends the benefits of natural ingredients, making it perfect for handwashing after gardening or cooking.
Ingredients
To make this lovely herb-infused soap, gather the following ingredients:
- Melt and Pour Soap Base (1 lb): This is your main ingredient. You can use glycerin, shea butter, or opaque soap bases.
- Grapeseed Oil (2 tablespoons): Moisturizing and light, it helps nourish the skin.
- Dried Heather Flowers (1 tablespoon): Provides gentle exfoliation and adds texture.
- Essential Oils:
- Thyme Oil (15 drops)
- Rosemary Oil (15 drops)
- Lavender Oil (15 drops)
- Optional Colorants: Natural colorants (like spirulina powder or beetroot powder) if you desire a tint.
Equipment
Before starting, ensure you have the following equipment:
- Microwave-safe Bowl or Double Boiler: For melting the soap base
- Soap Molds: Silicone molds work best for easy release.
- Mixing Spoon or Whisk: For blending the ingredients.
- Dropper: For adding essential oils.
- Measuring Spoons: To accurately measure the ingredients.
Step-by-Step Instructions
Prepare Your Workspace: Clean your workspace, and gather all ingredients and equipment. Ensure that your molds are clean and dry.
Melt the Soap Base:
- Cut the melt and pour soap base into small cubes.
- Place the cubes in a microwave-safe bowl and microwave in 30-second increments until fully melted. If using a double boiler, stir occasionally while melting over low heat.
Add Oils and Exfoliant:
- Once melted, remove the soap base from the heat. Allow it to cool slightly so it doesn’t damage the essential oils.
- Stir in grapeseed oil, followed by the dried heather flowers.
Incorporate Essential Oils:
- Using a dropper, add the thyme, rosemary, and lavender essential oils. Mix well until all ingredients are combined.
Pour into Molds:
- Carefully pour the mixture into your soap molds. Aim to fill them just below the top to allow for any expansion.
Let the Soap Set: Allow the soap to cool and harden. This may take about 1-2 hours at room temperature. Speed up the process by placing the molds in the refrigerator.
Unmold and Store: Once set, gently remove the soap cubes from the molds. Store them in a cool, dry place away from direct sunlight.
Tips for Success
- Experiment with Scents: Feel free to adjust the number of drops for each essential oil to suit your preference; however, keeping the total around 45 drops helps balance the fragrance.
- Customization: Consider adding other herbs such as chamomile or calendula, or even citrus oils for a fresh twist.
Common Mistakes to Avoid
- Overheating the Soap Base: This can cause the soap to bubble. Always melt gradually and stir frequently.
- Skipping the Essential Oil Cooling Step: Adding essential oils to very hot soap can reduce their aromatic properties.
- Not Using Proper Molds: Ensure your molds are silicone for easy release; other materials may stick.
Variations and Customization Ideas
- Color Variations: If you want to add color, add natural colorants at the same stage as the essential oils.
- Add Honey or Oatmeal: Consider including honey for extra moisture or oatmeal for added exfoliation.
- Scented Soaps: Try different combinations of essential oils, like a citrus blend with lemon and orange for a bright, uplifting experience.
Storage and Shelf Life
The finished soap cubes can be stored in a cool, dry environment for up to six months. To maintain their fragrance and texture, keep them wrapped in breathable materials like parchment paper or in organza bags.
Safety Tips
- Essential Oil Safety: Some essential oils can irritate the skin or be harmful in large amounts. Always do a patch test if you have sensitive skin.
- Protective Gear: If you’re interested in soap-making beyond melt and pour (like cold process), consider wearing gloves and goggles if handling lye and ensure your workspace is well-ventilated.
Frequently Asked Questions
1. Can I use a different soap base?
Yes, you can try various types of melt and pour soap bases, including glycerin or shea butter.
2. How do I know how much essential oil to use?
Typically, about 1 to 2% of your soap mixture should be essential oils. For this recipe, the total of 45 drops is approximately 2% for one pound of soap.
3. Can I use fresh herbs instead of dried?
Fresh herbs can be used; however, they may cause the soap to spoil faster due to moisture. Dried herbs are a safer option.
4. What if my soap doesn’t set properly?
Ensure that your soap base was melted appropriately and that you allowed enough cooling time before pouring it into molds. If not, simply remelt and try again.
5. Can kids help with this project?
Absolutely! This project is great for kids, especially the pouring and stirring steps, but always supervise to ensure safety with hot materials.
6. How can I wrap my soap for gifting?
You can wrap the soap in simple parchment paper and tie with twine, or place it in a decorative bag for an added touch.
Conclusion
Creating your own herb-infused soap cube infused with thyme, rosemary, and lavender is not only a fun DIY project but also a way to incorporate the refreshing essence of nature into your daily routine. With these simple steps, helpful tips, and customizable ideas, you’re well-equipped to embark on your soap-making journey. Enjoy the process and the delightful results—your skin will thank you for it! Happy crafting!