
How to Make Natural Rosemary Soap for Oily Skin
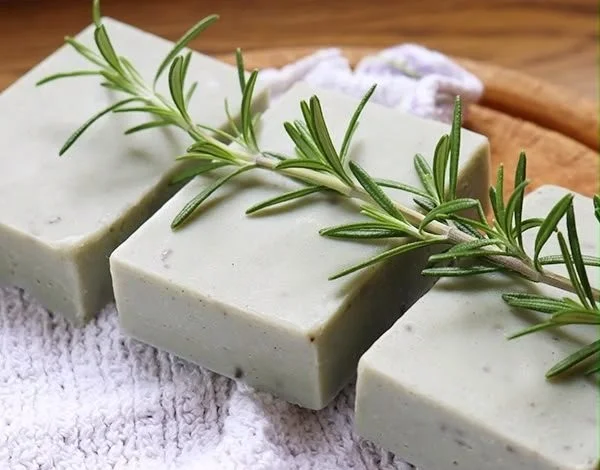
Making your own soap at home can be a rewarding and enjoyable experience, especially when you create something tailored to your skin type. In this article, I’ll show you how to make a natural rosemary soap that is perfect for oily skin. With the added benefits of fresh rosemary and Cambrian blue clay, you’ll enjoy the purifying properties while indulging in a refreshing DIY project. Let’s dive in!
Why You Will Love This Recipe
This homemade soap uses natural ingredients that are gentle on the skin yet effective at controlling excess oil production. Rosemary is known for its astringent properties, making it a fantastic choice for oily skin, while Cambrian blue clay helps draw out impurities. This soap not only cleanses the skin but also leaves it feeling refreshed and revitalized.
Ingredients
Before we get started, here are the ingredients you’ll need for this soap recipe:
- Olive Oil: 300 grams (provides moisture without clogging pores)
- Coconut Oil: 200 grams (adds lather and hardness)
- Palm Oil: 100 grams (helps with stability)
- Distilled Water: 170 grams (used to dissolve lye)
- Sodium Hydroxide (Lye): 70 grams (reacts with fats and oils to create soap)
- Fresh Rosemary: 40 grams (adds fragrance and benefits for oily skin)
- Cambrian Blue Clay: 25 grams (purifying and exfoliating agent)
- Essential Oil of Rosemary: 15 mL (optional, for added fragrance and benefits)
Equipment
Gathering the right equipment is crucial for a successful soap-making experience. Here’s what you’ll need:
- Digital scale
- Heatproof mixing bowl (preferably glass or stainless steel)
- Stick blender
- Soap mold (silicone works well)
- Thermometer
- Safety goggles and gloves (for handling lye)
- Measuring spoons
- Spatula
- Knife (for cutting soap)
- Parchment paper (if needed for lining the mold)
Step-by-Step Instructions
Note: This tutorial uses the cold process method, which involves mixing lye with oils at lower temperatures.
Preparation Time: 30 minutes
Making Time: 1 hour
Curing Time: 4-6 weeks
Estimated Yield: About 8 bars of soap
Prepare Your Workspace: Ensure that your workspace is clean and tidy. Lay down newspaper or an old towel to protect surfaces and put on your safety goggles and gloves.
Measure the Ingredients: Using a digital scale, measure out the distilled water and sodium hydroxide (lye). Always add lye to the water, never the other way around, to avoid a dangerous reaction.
Mix the Lye Solution: Carefully add the sodium hydroxide to the distilled water while stirring gently until it’s completely dissolved. The solution will heat up and emit fumes; do this in a well-ventilated area and allow the solution to cool to about 100°F (38°C).
Melt the Oils: In a separate heatproof bowl, combine the olive oil, coconut oil, and palm oil. Melt the coconut and palm oils gently over a double boiler or in the microwave until fully liquefied.
Combine Oils and Lye: When both the lye solution and the oils are around 100°F (38°C), slowly add the lye solution to the oils while blending with a stick blender. Blend until you reach “trace,” which means the mixture thickens and leaves a trail on the surface.
Add Rosemary and Cambrian Blue Clay: At trace, add finely chopped fresh rosemary and Cambrian blue clay to the soap batter. Blend gently to incorporate.
Pour into Mold: Pour the soap mixture into your mold, using a spatula to scrape the sides of the bowl. Tap the mold gently on the counter to remove air bubbles.
Insulate and Cure: Cover the mold with a towel and let it sit for 24–48 hours until it hardens. After this period, carefully remove the soap from the mold and cut it into bars.
Cure the Soap: Place the bars on a drying rack or a piece of parchment paper in a cool, dry area with good airflow. Allow the soap to cure for 4–6 weeks. This is essential for the soap to harden and for the lye to completely neutralize.
Tips for Success
- Accurate Measurement: Use a digital scale for precise measurements, especially when it comes to lye.
- Temperature Monitoring: Keep an eye on the temperatures of both your lye solution and oils. They should be close in temperature when mixed.
- Avoid Overmixing: When adding ingredients, mix until just combined to avoid losing the desired texture.
Common Mistakes to Avoid
- Incorrect Lye Ratio: Always calculate the exact amount of lye needed using a reliable soap calculator to avoid caustic issues.
- Ignoring Safety: Always wear protective gear while handling lye, and work in a well-ventilated area.
- Rushing the Cure: Don’t cut the soap too soon. Allow it the full curing time for the best results.
Variations and Customization Ideas
- Add Other Herbs: Consider adding other beneficial herbs that suit oily skin, like tea tree or a few drops of lavender essential oil for added fragrance.
- Alter Colors: You can use different natural colorants like spirulina or turmeric for varying soap aesthetics.
- Different Oils: Experiment with other oils like avocado or castor oil to change the properties of your soap.
Storage and Shelf Life
Store your finished soap bars in a cool, dry place away from direct sunlight. Ideally, keep them in a breathable container, like a cardboard box, to allow air circulation. Properly cured soap can last for quite a long time, usually up to 12 months or more, but for the best quality, use it within six months.
Safety Tips
- Handling Lye: Always wear gloves and goggles when working with lye. It can cause severe burns if it comes into contact with skin.
- Ventilation: Ensure your workspace is well-ventilated when mixing lye. Avoid breathing in fumes.
Frequently Asked Questions
Why use rosemary in soap?
- Rosemary has natural astringent properties, helping to control oil production on the skin.
Can I skip Cambrian blue clay?
- While it adds benefits, you can leave it out if you don’t have it on hand. Your soap will still be effective.
What can I substitute for coconut oil?
- You can replace coconut oil with a similar fatty oil, like palm oil or olive oil, though it may affect lather quality.
How long does the soap need to cure?
- Cold process soaps typically require 4–6 weeks to fully cure and be safe to use.
Is this soap suitable for sensitive skin?
- If you have sensitive skin, consider reducing essential oils and rosemary content, or performing a patch test before use.
Conclusion
Making your natural rosemary soap for oily skin is not only a great way to indulge in a DIY project but also creates a product that can help balance your skin. This recipe offers both effectiveness and creativity in crafting your own personalized skincare. I encourage you to gather your ingredients and give this beautiful soap a try. You’ll not only cherish the process but also enjoy the wonderful benefits it provides for your skin! Happy soap making!