
Learn How to Easily Make All-Natural Wax Melts at Home
There’s something magical about walking into a home that smells wonderful. Whether it’s the aroma of freshly baked cookies or the soothing scent of lavender, fragrances can transform a space and enhance our mood. If you’re looking for a way to infuse your home with delightful scents without using synthetic products, making all-natural wax melts is a perfect DIY project. In this article, I will guide you step-by-step on how to create easy and natural wax melts using plant-based wax, essential oils, and herbs. Let’s get started!
Why You Will Love This Recipe
- Natural Ingredients: Avoid artificial fragrances and toxins by using plant-based wax and essential oils.
- Customizable Scents: Experiment with different essential oil combinations to create your own unique aromas.
- Easy to Make: This project requires minimal ingredients and is suitable for beginners.
- Perfect for Gifts: Homemade wax melts make thoughtful presents for friends and family.
- Cost-effective: Making your own wax melts can save you money compared to store-bought options.
Ingredients
To make all-natural wax melts, you will need the following ingredients:
Basic Ingredients:
- Plant-based wax (e.g., soy wax, beeswax, or a blend): 1 cup
- Essential oils: 30-40 drops (your choice of scent—lavender, peppermint, citrus blends, etc.)
- Dried herbs or flowers (optional): 2 tablespoons (such as lavender buds, rosemary, or chamomile)
Optional Add-Ins:
- Colorants: natural colorants like beet powder or turmeric for a touch of color (use sparingly).
Equipment
You will need the following equipment to create your wax melts:
- Double boiler or microwave-safe container for melting wax
- Silicone molds or ice cube trays for shaping your melts
- Stirring utensil (a wooden stick or spoon works well)
- Droppers or pipettes for measuring essential oils (optional)
Step-by-Step Instructions
Creating your own wax melts is easy! Follow these steps to get started:
Step 1: Melt the Wax
- Set Up a Double Boiler: Fill the bottom part of your double boiler with water and bring it to a gentle simmer. If you don’t have a double boiler, you can use a microwave-safe bowl.
- Add Wax: Place the plant-based wax in the top part of the double boiler (or in the microwave) and allow it to melt completely. This typically takes about 10-15 minutes on the stove or 1-2 minutes in the microwave (stop to stir every 30 seconds).
Step 2: Add Essential Oils
- Remove from Heat: Once the wax is melted, take it off the heat source.
- Mix in Essential Oils: Add your chosen essential oils. Start with 30 drops and adjust to your preferred scent strength. Stir well to ensure the oils are thoroughly integrated.
Step 3: Add Dried Herbs (Optional)
- Incorporate Herbs: If you’re using dried herbs or flowers, now’s the time to add them. Stir well to distribute evenly.
Step 4: Pour into Molds
- Mold the Mixture: Carefully pour the wax mixture into your silicone molds or ice cube trays. Fill each mold to the top, but avoid overflow.
- Cool and Set: Allow the wax melts to cool at room temperature until they harden completely, which can take 1-2 hours.
Step 5: Remove and Store
- Unmold the Melts: Once cooled, gently pop the wax melts out of the molds.
- Storage: Store the finished wax melts in an airtight container in a cool, dark place until you’re ready to use them.
Tips for Success
- Temperature Matters: Be careful not to overheat the wax, as it can affect the scent throw. Aim for around 160-180°F (71-82°C).
- Test Different Scents: Before fully committing to an essential oil blend, do a small test pour to see how the scents blend when melted.
Common Mistakes to Avoid
- Forgetting to Stir: Skipping the stirring process can lead to uneven scent distribution.
- Using Low-Quality Oils: Not all essential oils are created equal; opt for high-quality, pure essential oils for the best results.
- Overfilling Molds: Leave a little space at the top of each mold to avoid mess during the cooling process.
Variations and Customization Ideas
Feel free to get creative with your wax melts! Here are a few ideas to customize your melts:
- Blended Scents: Combine different essential oils for unique scent profiles (e.g., peppermint and eucalyptus, or orange and cinnamon).
- Seasonal Scents: Try seasonal combinations like pine and cedarwood for winter or lemongrass and basil for summer.
- Decorative Additions: Mix in biodegradable glitter or natural colorants for added visual appeal.
Storage and Shelf Life
When stored in a cool, dry place, your wax melts can last up to a year. Ensure that they are kept away from direct sunlight and heat sources to maintain their fragrance and quality.
Safety Tips
- Work Safely: Always handle hot wax with care to prevent burns. Use oven mitts or heat-resistant gloves as needed.
- Ventilation: Ensure you are working in a well-ventilated area when dealing with essential oils.
- Essential Oil Cautions: Research the essential oils you plan to use, as some oils may not be safe for pets or children.
Frequently Asked Questions
Q1: How many wax melts does this recipe make?
Depending on the size of your molds, this recipe typically yields about 10-15 wax melts.
Q2: Can I use paraffin wax?
While you can use paraffin wax, it is not plant-based and may release harmful chemicals when burned. We recommend using plant-based options for a healthier home environment.
Q3: How do I use wax melts in a warmer?
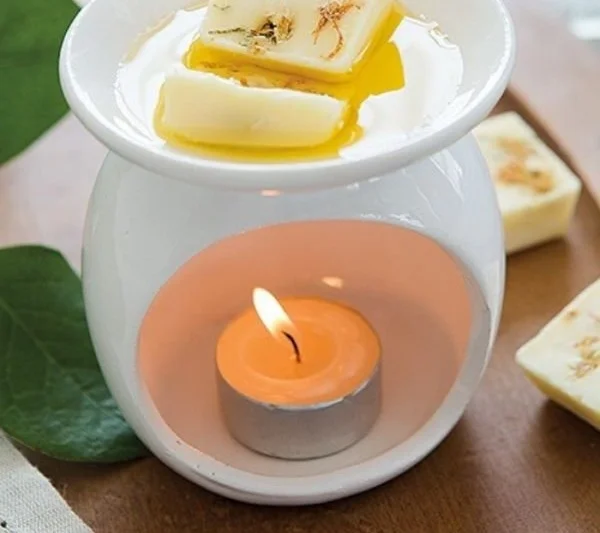
Simply place one or two wax melts in the top dish of your electric or tealight wax warmer, turn it on, and enjoy the amazing aroma as they melt.
Q4: What if my melts are too soft?
If your wax melts are too soft, they may need a different wax blend or slightly more wax. Consider using a higher ratio of wax to essential oils.
Q5: Can I use fresh flowers instead of dried?
Fresh flowers may not work well as they contain moisture, which can affect the wax melting process. It’s best to stick with dried herbs or flowers.
Q6: How do I clean up spilled wax?
If wax spills occur, allow it to harden, and then gently scrape it off with a plastic scraper. Heat can also be used to re-melt and clean the residue.
Conclusion
Making all-natural wax melts at home is a fun and rewarding project that fills your space with beautiful aromas while using safe, plant-based ingredients. With a little practice and creativity, you can create wonderful scents tailored to your preferences or perfect for gifting. So gather your supplies, get inspired, and start crafting your own delightful wax melts today!