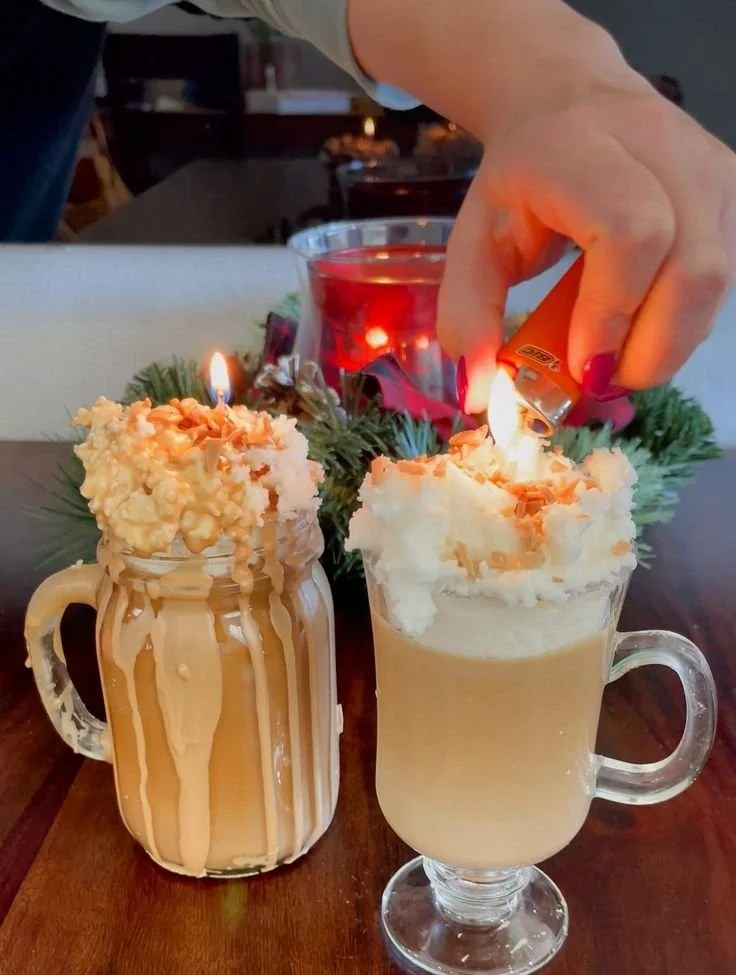

Indulge Your Senses with the Hot Cocoa Candle Kit
Creating your own homemade candles can be an incredibly rewarding and enjoyable experience, especially when you’re using a kit like the Hot Cocoa Candle Kit. This delightful craft allows you to indulge your senses with a pair of cozy, charming candles that bring warmth to your living space or make perfect gifts. With its easy-to-melt wax and simple layering techniques, you can create a comforting candle set that not only enhances your decor but also fills your home with inviting aromas.
Let’s walk through everything you need to know to make your own deliciously scented DIY candles, from ingredients and equipment to tips for success and safety precautions!
Why You Will Love This Recipe
Candles have a way of transforming an ordinary space into a haven of comfort. The Hot Cocoa Candle Kit not only provides you with the satisfaction of creating something beautiful but also allows you to explore your inner DIY artist. Here are a few reasons to get excited about this project:
- Fun and Engaging: Candle making is a delightful activity that’s perfect for individuals or families looking for a fun craft project.
- Personalized Touch: You can customize your candles with different colors and scents, making each candle unique.
- Great Gifts: Handmade gifts are always cherished, and scented candles make for thoughtful presents for friends and family.
- Easy to Follow: This kit is user-friendly and ideal for beginners, allowing you to create lovely candles in just an hour.
Ingredients
To create your Hot Cocoa candles, you will need the following materials from the kit:
- Palm paraffin blend wax: Approximately 1 pound (you will typically find enough in the kit for two candles)
- Dye chips: These can typically be found in a variety of colors; you’ll need a few chips depending on the desired depth of color.
- Scent: A hot cocoa fragrance oil is typically provided in the kit; aim for about ½ ounce per candle for a lovely scent throw.
- Clear mugs: Two clear glass or ceramic mugs to hold your candles.
Equipment
In addition to the ingredients, you will also need some basic equipment. Here’s what you’ll need to have on hand:
- A stovetop
- A pot for melting wax (double boiler works best)
- A heat-safe container or smaller pot (if not using a double boiler)
- Tin foil (to cover your candles while they set)
- A kitchen towel
- A thermometer (optional, but helpful for temperature control)
- A stirring utensil (wooden spoon or silicone spatula)
Step-by-Step Instructions
Follow these easy steps to create your own cozy Hot Cocoa candles:
Preparation Time:
- Total Time: About 1 hour to make and 3 hours for the candles to set.
Candle Making Process:
Prepare Your Workspace:
- Clear a space on your kitchen counter and gather all your ingredients and equipment.
Melt the Wax:
- Begin by measuring ½ pound of the palm paraffin blend wax for each candle.
- Place the wax in your pot or double boiler and heat it over medium-low heat, stirring gently.
Add Color:
- Add dye chips to the melted wax. Start with 2-3 chips and stir well. You can add more chips until you achieve your desired hue.
Incorporate Fragrance:
- Once the wax is fully melted and the color is just right, take the pot off the heat and add your fragrance oil. Stir thoroughly to ensure an even distribution of scent. Aim for ½ ounce of fragrance oil for each candle.
Wick Preparation:
- If your kit includes pre-wicked tabs, attach the wick to the center of each clear mug. If not, use a hot glue gun to fix one end of the wick to the bottom of the mug.
Pour the Wax:
- Carefully pour the melted wax into each mug until they are filled to about ½ inch from the top.
Layering (Optional):
- If you want to create layers, let the first layer set for about 30 minutes before pouring additional colors or wax.
Cooling:
- Once you’ve filled your mugs, place tin foil over the top to protect your candles while they cool. Allow them to set undisturbed for about 3 hours.
Trim the Wicks:
- Once the candles are fully set, trim the wicks to about ¼ inch above the surface of the wax.
Tips for Success
- Temperature Control: Keep an eye on the temperature of your wax. Overheating can cause it to smoke or burn, while wax that’s too cool won’t pour nicely.
- Stir Well: Be sure to stir your mixture thoroughly when adding fragrance and dye to ensure a uniform appearance.
- Patience is Key: Allow the candles to set fully for the best results. Rushing this step could lead to uneven surfaces or sinkholes.
Common Mistakes to Avoid
- Skipping the Wick Testing: Always test the wick size and type as different waxes and scents burn differently.
- Overheating the Wax: Monitor the temperature and avoid overheating, which can lead to undesirable scents and texture.
- Not Allowing Enough Setting Time: Patience is crucial. Giving your candles the full time to set will enhance their final look and burn quality.
Variations and Customization Ideas
- Color Customization: Experiment with different dye chip combinations to create unique color gradients or stripes.
- Fragrance Combinations: Mix the hot cocoa scent with hints of peppermint, vanilla, or cinnamon for a festive twist.
- Decorative Add-Ins: You can add dried flowers or herb sprigs to the pour for added visual appeal.
Storage and Shelf Life
Store your finished candles in a cool, dry place away from direct sunlight. Keep them in their original containers or wrapped in protective material to prevent dust accumulation. When stored properly, candles can last for several months; however, it’s best to use them within a year for optimal fragrance.
Safety Tips
- Burning Safety: Always burn candles on a heat-resistant surface, away from flammable objects. Never leave a burning candle unattended.
- Handling Hot Wax: Be cautious when working with melted wax, as it can cause burns. Always handle your melting pot with care and wear protective gloves if necessary.
- Ventilation: Ensure your working area is well-ventilated, especially when melting fragrance oils.
Frequently Asked Questions
1. Can I use other types of wax for my candles?
Yes, other waxes like soy wax or beeswax can be used, but be sure to adjust the melting temperature and wick size accordingly.
2. My candles have a rough surface; what can I do?
This can happen if the wax cools too quickly. Try pouring at a slightly higher temperature next time or allow the first layer to cool more slowly.
3. What should I do if my wick keeps extinguishing?
This could be due to an incorrect wick size or placement. Make sure your wick is appropriate for the diameter of your container, and consider trimming it to a proper height.
4. How can I enhance the scent throw of my candles?
Try increasing the amount of fragrance oil within the safe limits or using wick types that have a better scent throw, such as wood wicks.
5. Can I gift these candles?
Absolutely! Homemade candles make wonderful gifts. Just remember to use decorative packaging and include care instructions for the recipient.
6. How long will the scent of my candles last?
The scent can last several hours while burning, but the longevity in storage depends on proper sealing and storage conditions.
Conclusion
Making your own Hot Cocoa candles can be a fun and fulfilling project that fills your home with comforting scents and creates a cozy atmosphere. With the right materials, techniques, and a sprinkle of creativity, you can customize your candles to delight yourself and your loved ones. So, gather your supplies, follow the steps outlined, and enjoy the magical experience of candle making!
Happy crafting, and may your home be filled with warm light and delightful aromas!