
Watermelon Soap: A Bright and Cheerful Summer DIY Project
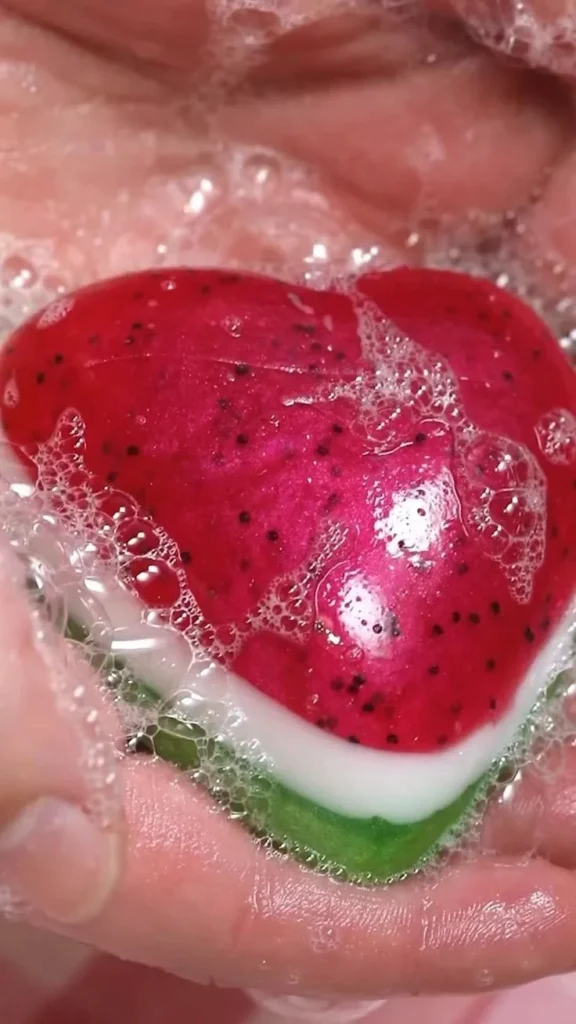
Watermelon soap is a delightful summertime project that’s as fun to make as it is to use. With its vibrant colors and refreshing scent, this soap embodies the essence of summer, making it a perfect gift for friends and family or a treat for yourself. Using the melt and pour method, you can create layers of bright red and green that mimic a juicy watermelon, complete with poppy seeds for texture. Follow along as we guide you through this colorful soap-making adventure!
Why You Will Love This Recipe
There’s something inherently joyful about creating a product that is not only visually appealing but also smells incredible. Watermelon soap is:
- Easy to Make: Perfect for beginners and seasoned makers alike.
- Customizable: You can adjust scents, colors, and textures to suit your preferences.
- Quick: You can complete this project in just a few hours, making it suitable for a weekend activity.
- Perfect for Gifting: Handmade soap is a thoughtful gift that shows you care.
Ingredients
To create your own watermelon soap, you’ll need the following ingredients:
- 1 lb (16 oz) of clear melt and pour soap base
- 1 lb (16 oz) of white melt and pour soap base
- 1 tablespoon of watermelon fragrance oil (or as per your preference)
- 1 teaspoon of red soap colorant (or as needed)
- 1 teaspoon of green soap colorant (or as needed)
- 1 tablespoon of poppy seeds (for texture)
Equipment
Gather the following equipment before you start:
- Microwave-safe bowls or containers
- A digital scale (for accurate measurements)
- Soap mold (silicone molds work well)
- Spritz bottle with isopropyl alcohol (for layering)
- Spoon or whisk for mixing
- Knife for cutting the soap base
- Heat-resistant gloves (optional for handling hot materials)
Step-by-Step Instructions
Prepare Your Workspace: Clear your counter or table and cover it with newspaper or a silicone mat to catch spills.
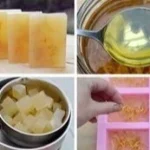
Cut the Soap Base: Use your knife to cut the clear melt and pour soap base into small cubes (around 1-inch). This ensures even melting.
Melt the Clear Soap Base: Place the clear soap cubes in a microwave-safe bowl and heat in 30-second intervals, stirring in between, until fully melted.
Add Color and Fragrance:
- Once melted, carefully add the red soap colorant to the clear base, stirring until you reach your desired shade of red.
- Mix in the watermelon fragrance oil and stir well.
Pour the First Layer:
- Spray the soap mold with isopropyl alcohol to help the layers adhere later.
- Pour the red soap mixture into the mold, filling it halfway. Allow it to cool for about 15-20 minutes until it’s slightly firm, but not completely set.
Prepare the White Soap Base: While the first layer is cooling, cut the white melt and pour soap base into cubes. Repeat the melting process.
Add Poppy Seeds: Once the white soap base is melted, stir in the poppy seeds. This adds a fun texture that resembles watermelon seeds.
Pour the Second Layer:
- Carefully pour the white soap mixture over the red layer. To avoid disturbing the red layer, pour gently and at an angle. Spray with isopropyl alcohol to help them adhere.
- Allow this layer to cool for around 20 minutes.
Create the Green Top Layer:
- Melt the remaining clear soap base and mix in the green colorant to achieve a bright green shade.
- Pour this green soap over the white layer, allowing for a similar spritz of isopropyl alcohol.
Final Cooling: Let the mold cool completely, ideally for a few hours or until fully set.
Unmold the Soap: Once fully cooled, gently remove the soap from the mold. If it sticks, you can place the mold in the freezer for a few minutes to help dislodge it.
Tips for Success
- Patience Is Key: Wait for each layer to cool a bit before pouring the next; this ensures that the layers don’t mix.
- Use Isopropyl Alcohol: Spraying each layer with alcohol helps prevent bubbles and allows layers to adhere properly.
Common Mistakes to Avoid
- Pouring Layers Too Soon: If you don’t wait long enough between layers, they may blend together rather than remain distinct.
- Overheating the Soap: Soap can scorch if heated too long. Always proceed with short intervals in the microwave.
Variations and Customization Ideas
- Scent Variations: Try different fragrances such as cucumber or lime for a unique spin.
- Color Combinations: Experiment with different shades of red and green for a more dynamic look.
- Adding Botanical Elements: Incorporate dried flowers or herbs for a more luxurious touch.
Storage and Shelf Life
Store your watermelon soap in a cool, dry place away from direct sunlight. When properly stored, it can last up to 6 months. Keep in mind that humidity can affect soap quality, so use airtight containers if necessary.
Safety Tips
- Handle with Care: While melt and pour soap is safer than lye-based methods, never eat or touch it unless fully cooled.
- Avoid Allergens: Check all ingredients for potential allergens and perform a patch test before use.
Frequently Asked Questions
1. Can I use different molds for my soap?
Absolutely! Silicone molds come in various shapes and sizes, so feel free to experiment.
2. How can I make my soap more moisturizing?
Consider adding skin-friendly oils like coconut or olive oil into your melted soap before pouring.
3. Is it safe to use fragrance oils in soap?
Yes, but ensure you’re using skin-safe fragrance oils specifically made for cosmetic use.
4. How should I package my homemade soap for gifts?
Wrap your soap in clear cellophane or place it in a decorative box for a beautiful presentation.
5. Can I add color to my soap after melting it?
Yes, but ensure you mix it in well before pouring to avoid streaks.
6. What should I do if my layers don’t stick?
This can happen if the soap layers cool too much. Try spritzing with isopropyl alcohol before pouring the next layer.
Conclusion
Making watermelon soap is a rewarding DIY project that adds a splash of summer joy to your day. The vibrant colors and delightful fragrance make this soap not only a treat for yourself but also a charming gift for loved ones. With patience and creativity, you can create stunning layers that mimic everyone’s favorite summertime fruit. So gather your ingredients, get your materials ready, and let’s dive into the wonderful world of homemade soap-making! Happy crafting!