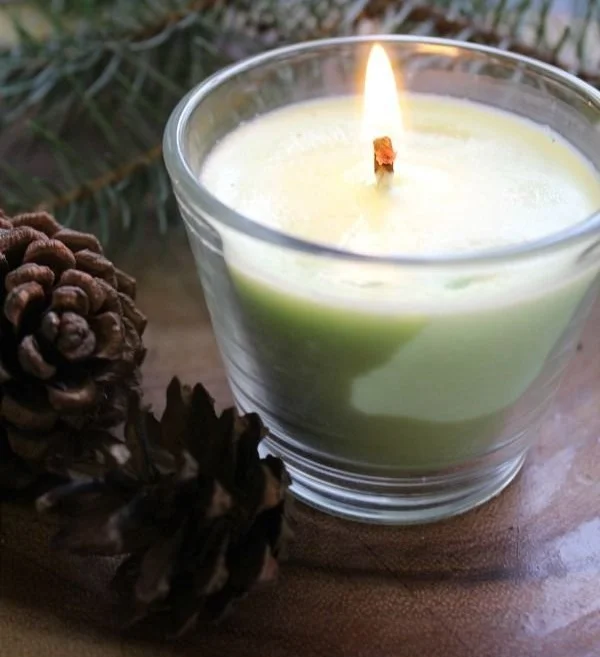

Fresh Pine DIY Candle
Creating your own candles at home can be both a fun and rewarding activity. This guide will walk you through making a Fresh Pine DIY Candle, perfect for bringing a touch of nature into your home. With a delightful pine scent, this candle is ideal for cozy evenings or as a thoughtful homemade gift. Let’s get started!
Why You Will Love This Recipe
This Fresh Pine DIY Candle recipe is not only easy to follow but also customizable to fit your preferences. You have complete control over the ingredients, the scent strength, and the type of container you use. Plus, making your own candles will allow you to fill your space with a beautiful scent while avoiding the potentially harmful additives often found in store-bought options.
Ingredients
- Wax: 1 pound soy wax (or beeswax for a more natural option)
- Fragrance oil: 1 ounce fresh pine fragrance oil
- Dye: Optional—2-3 drops of green candle dye (if desired)
- Wick: 1 cotton wick (appropriate for the diameter of your container)
- Container: Heat-resistant glass jar or metal tin
Equipment
- Double boiler or microwave-safe container
- Pouring pitcher or ladle
- Thermometer
- Stirring stick (wooden or heat-resistant silicone)
- Scale for measuring
- Wick holder or adhesive (to secure wick to the bottom of the container)
Step-by-Step Instructions
Preparation Time
- Preparation: 15 minutes
- Making: 1 hour (includes cooling time)
- Yield: Approximately 1 candle (depending on container size)
Candle-Making Steps
Set Up Your Work Area
- Choose a clean, flat work surface to prevent spills.
- Lay down newspaper or parchment paper to catch any drips.
Measure Your Ingredients
- Weigh out 1 pound of soy wax using your scale.
Melt the Wax
- Double Boiler Method: Fill the lower pot with water and place it over medium heat. Put the wax in the upper pot and allow it to melt, stirring occasionally.
- Microwave Method: Place the wax in a microwave-safe container and heat it in 30-second intervals, stirring between heating until fully melted.
Add Fragrance and Dye
- Once the wax has melted, check the temperature; it should be around 170°F (77°C).
- Stir in 1 ounce of fresh pine fragrance oil. If you are using dye, add 2-3 drops at this stage and mix thoroughly until fully incorporated.
Prepare the Wick
- Secure the wick to the bottom of your container using adhesive or by dipping it briefly into the melting wax.
- Use a wick holder to position it in the center of the container if necessary.
Pour the Wax
- Allow the wax to cool slightly (ideally around 150°F or 65°C) before pouring it into the container. This helps minimize shrinkage.
- Slowly pour the wax into the container, filling it to your desired level, leaving about half an inch of space at the top.
Cool the Candle
- Allow the candle to cool completely at room temperature, which may take up to an hour. Avoid moving the candle until it is fully set.
Trim the Wick
- Once cooled and solidified, trim the wick to about 1/4 inch above the wax surface.
Cure the Candle
- For the best scent throw, allow your candle to cure for at least 48 hours before burning.
Tips for Success
- Always keep an eye on the melting wax; it can become quite hot and should never be left unattended.
- Experiment with adding essential oils or other scents if desired, but keep in mind that the dilution ratio should remain balanced.
- Maintain a clean workspace and have all your equipment ready before you start.
Common Mistakes to Avoid
- Overheating the wax: Always monitor the temperature closely to avoid burning the wax, which can alter the scent and color.
- Not allowing the candle to cure: Burning your candle too soon will result in a weaker scent throw.
- Using the wrong wick size: If your candle flickers or has excessive tunneling, it could mean your wick is too small or too large for your container.
Variations and Customization Ideas
- Add color: Besides green dye, try other colors to match your décor.
- Mix scents: Combine your fresh pine fragrance with other scents like cedarwood or eucalyptus for a unique aroma.
- Decorative containers: Use different containers and shapes to create a more personalized touch to your candle.
Storage and Shelf Life
Store your finished candles in a cool, dry place, away from direct sunlight. Homemade candles have a shelf life of up to a year or longer if stored properly. Keep in mind that scents can fade over time, especially if exposed to light or heat.
Safety Tips
- Always work in a well-ventilated area when using fragrance oils and dyes.
- Keep flammable materials away from your candle during the making process.
- Ensure that the area where you burn your candle is free from drafts to prevent uneven burning.
Frequently Asked Questions
1. Can I use other types of wax for this candle?
Yes! You can use paraffin wax, palm wax, or even a beeswax blend. Each type has its own characteristics and benefits.
2. How do I know which wick to use?
Choose a wick based on the diameter of your container. Wicks are typically categorized for different container sizes, so check a wick guide for recommendations.
3. What if my candle has cracks or sinkholes?
These issues often arise from rapid cooling. A slow, even cooling process helps prevent these defects. You can also remedy surface imperfections by melting the top layer and smoothing it out.
4. How can I ensure a clean burn when lighting my candle?
Always trim the wick to 1/4 inch before lighting. This helps prevent soot and ensures consistent burning.
5. Can I fragrance my candle with essential oils instead of fragrance oils?
Yes, you can, but essential oils typically have a lower scent throw than fragrance oils.
6. How do I safely extinguish my candle?
Always extinguish your candle by using a candle snuffer or gently blowing it out. This prevents wax splatter and smoke issues.
Conclusion
Now that you’ve learned how to make a Fresh Pine DIY Candle, why not give it a try? Making your own candles allows you to fill your home with warmth and your favorite aromas while offering an enjoyable DIY project. With these straightforward steps, tips for success, and customization ideas, you’ll be well on your way to creating beautifully scented candles that reflect your personal style. Happy crafting!