
Want to Make Your Own Beautiful Scented Candles?
Candle making is both a delightful and satisfying DIY project that allows you to create beautiful scented candles right in your own home. With just a few materials, you can craft candles that not only fill your space with wonderful aromas but also serve as thoughtful handmade gifts. In this guide, we will walk you through the essential steps of homemade candle making, from selecting the right materials to incorporating unique designs and scents.
Why You Will Love This Recipe
Embarking on a candle-making journey is more than just a fun hobby—it unleashes your creativity and provides a relaxing experience. Plus, there’s something undeniably satisfying about lighting a candle you crafted yourself. You can customize fragrances to reflect your personal style, create themed candles for special occasions, and design visually stunning holders that enhance any room’s decor.
Ingredients
Wax Types
- Soy Wax: 1 lb (16 oz). A natural wax made from soybeans, ideal for beginners due to its ease of use and excellent scent throw.
- Paraffin Wax: 1 lb (16 oz). The most common wax type for candles, known for its smooth finish and affordability.
- Beeswax: 1 lb (16 oz). Natural and non-toxic, beeswax candles burn longer and emit a subtle honey scent.
Fragrance Oils
- Depending on your preference, use about 1 oz of fragrance oil per pound of wax. Ensure it’s specifically designed for candle making to achieve the best results.
Wicks
- Choose wicks suitable for the wax type you select. For soy wax, a CD or ECO wick is recommended, generally around 6-8 inches long for small to medium jars.
Containers
- Glass jars (e.g., Mason jars), metal tins, or silicone molds. The size of the container will determine how much wax you need.
Equipment
- Double boiler or a wax melter
- Thermometer
- Stirring spoon or spatula
- Wick holder or pencil/ chopstick (to keep the wick centered while pouring)
- Scale (for measuring wax and fragrance)
- Containers for pouring
Step-by-Step Instructions
Preparation Time: 10 Minutes
Making Time: Approximately 2 hours (includes cooling)
Yield: About 2 medium-sized candles (8 oz each)
- Measure the Wax: Use your scale to measure 1 pound of the wax type you selected.
- Melt the Wax: Set up a double boiler. Add the wax to the upper part and fill the lower part with water. Heat over medium-low until fully melted (approx. 170-180°F for soy and paraffin).
- Add Fragrance: Once the wax is melted, remove from heat and let cool to about 160°F. Add 1 oz of fragrance, stirring gently for 2 minutes to ensure an even distribution.
- Prepare the Wick: Secure the wick to the bottom of your container with a drop of melted wax. Center it using a wick holder or a pencil/chopstick laid across the top of the container.
- Pour the Wax: When the wax cools to approximately 140-150°F, carefully pour it into your prepared containers. Leave a small amount of wax in the pot for topping off later if needed.
- Cool and Cure: Allow the candles to cool undisturbed for several hours. If tops become uneven, you can reheat the reserved wax and pour it on top for a smooth finish.
- Trim the Wick: Once fully cooled and set, trim the wick to about 1/4 inch above the surface of the candle.
Tips for Success
- Always work in a well-ventilated area.
- Use a thermometer to monitor wax temperature accurately—this helps in achieving a smooth finish.
- Experiment with fragrance combinations, but start with the recommended amount; you can adjust in future batches based on your preference.
- Allow the candles to cure for at least 48 hours before burning to enhance fragrance throw.
Common Mistakes to Avoid
- Overheating the Wax: This can affect the performance of the candle and may lead to a poor finish.
- Skipping Wick Testing: Just like fragrances, wicks can behave differently based on the wax used. Always test wicks in small batches.
- Not Disturbing During Curing: Allowing your candles to set without moving them is crucial for a stable and smooth finish.
Variations and Customization Ideas
- Layered Candles: Pour different colored wax in layers for a unique look.
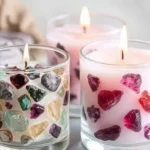
- Additives: Consider adding botanical elements like dried flowers or herbs for a decorative touch.
- Color: Use candle dyes to personalize the color of your candles.
Storage and Shelf Life
Store your candles in a cool, dark place, away from direct sunlight, as this can fade colors and degrade wax. When stored correctly, homemade candles can last up to one year.
Safety Tips
- Always observe candle safety while burning. Keep lit candles away from flammable objects and never leave them unattended.
- If using fragrances derived from essential oils, conduct a sensitivity test first, as some may irritate the skin.
Frequently Asked Questions
1. How long should I let my candles cure before burning?
Let your candles cure for at least 48 hours. The longer you wait (up to two weeks), the better the scent throw.
2. Can I use any glass jar for my candle?
Ensure the jar is heat resistant. Repurposed glass jars, like food jars, can work, but make sure they are clean and free of residues.
3. How do I fix candles that won’t stay lit?
If the wick is too short or the candle has poor wax-to-fragrance ratio, consider trimming the wick or adjusting the fragrance.
4. What should I do if my candles crack?
Cracking is often due to rapid cooling. Allow your candles to cool at room temperature and avoid drafts during the curing process.
5. Can I mix different types of wax?
Yes, but be mindful of their melting points. Mixing wax types can affect candle performance.
6. Is it safe to burn scented candles?
Yes, when made correctly with appropriate materials, scented candles are generally safe to burn if used responsibly.
Conclusion
Now that you know the basics of candle making, it’s time to let your creativity shine! Making your own beautiful scented candles is a rewarding experience that can transform your home or be gifted to loved ones. Remember to start simple, follow the tips discussed, and enjoy the lovely aromas you create. Gather your materials, set aside time to craft, and revel in the satisfaction of lighting a candle you made with your own hands! Happy candle making!