
Getting Started with Handmade Soap Curing
Imagine this: you’ve just spent a delightful afternoon in your kitchen, mixing oils, lye, and beautiful natural ingredients, all in anticipation of creating your very own handmade soap. The scents wafting through your space are intoxicating, and you’re dreaming of how gorgeous your skin’s going to feel. Sound familiar? The thrill of soap making is only heightened when you realize that to unleash the full potential of your creation, you need to cure that soap properly. Let’s dive into how to do just that and why it’s an essential step you won’t want to skip.
Why We Cure Handmade Soap
Before we jump into the tips for curing your soap, let’s explore why this step is so crucial. You might be wondering, why not just use the soap right away? Here are three solid reasons for giving your soap that much-needed curing time:
Enhancing Quality
When you cure your soap, you’re effectively allowing time for the saponification process—the chemical reaction between oils and lye—to complete fully. This isn’t just a technical step; it’s a transformative one. The longer the soap cures, the better the texture, lather, and skin benefits. So, while your soap may look lovely right out of the mold, it often feels greasy or overly caustic if used too soon. Curing improves the overall quality, yielding a bar that’s gentle, moisturizing, and luxurious.
Safety First
Another critical reason to cure your soap is safety. Freshly made soap contains lye, which, if not properly saponified, can irritate or damage your skin. It’s essential to give it adequate time—usually around four to six weeks—to ensure that all lye has interacted with the oils. This makes your soap not only safe to use but also effective at cleansing without harsh chemicals irritating your skin.
Longevity and Performance
Let’s face it—nobody wants their beautifully crafted soap to dissolve into mush after just one wash. A proper curing process helps your soap harden, making it last longer in the shower. Cured soap has a lower water content, which means it won’t dissolve as quickly, allowing for a longer-lasting product. Plus, those glorious scents and beneficial properties of your carefully selected ingredients truly shine in a well-cured bar, providing you with a richer experience in your skincare routine.
Tips for Curing Handmade Soap
Now that you’re all pumped about curing your soap, here’s how to do it right. Follow these steps to ensure your homemade bars turn out amazing:
1. Choose the Right Time
Timing is everything in the soap curing game. You generally want to let your soap cure for a minimum of four weeks, though six to eight weeks is ideal if you want a super hard and well-matured bar. You might think waiting is torture (it kinda is), but let’s be honest, good things come to those who wait.
2. Cut Your Soap Properly
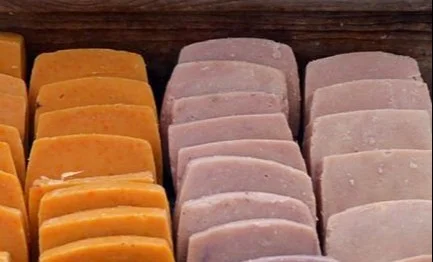
Once your soap is set, using a sharp knife or soap cutter, cut it into bars. It’s tempting to cut them too soon, but resist that urge! Wait at least 24 hours after making the soap before you cut it, ensuring it has had a chance to form a skin. Cutting the bars allows for more surface area, enabling better airflow for curing.
3. Provide Plenty of Airflow
Place the soap on a drying rack or an open box lined with parchment paper. Proper airflow is crucial for an even cure. You want those lovely bars to dry out and cure without sitting in moisture. Stacking them, however, can lead to soggy bottoms. Keep them spaced out and in a cool, dry place.
4. Monitor Temperature and Humidity
Soap loves a stable environment. Ideally, you want to cure your soap in a cool, dark place with low humidity. If you’re in a humid climate, consider setting your bars on a drying rack over a dehumidifier to maintain optimal conditions. Too much moisture can slow down the curing process and affect your final product.
5. Rotate Your Bars
If possible, rotate or flip your bars periodically. This does two things: it exposes different sides to air, promoting an even cure and prevents any flat spots from forming on the bottoms.
6. Cover If Needed (But Not Too Much)
If you live in a particularly dusty environment, you might want to cover your soap with a light cloth. Just make sure it can breathe! Preventing dust from settling while still allowing airflow is a delicate balance, but your future self will thank you for taking this extra step.
Storing Cured Soap Properly
Now that your soap is beautifully cured, you don’t want to ruin it by storing it incorrectly. Here are some tips to keep those bars fresh until you’re ready to use them:
Keep It Dry
Store your cured soap in a dry area, away from moisture. Bathrooms can be steamy and humid, so consider finding another spot, like a linen closet or a shelf in a cool, dry room.
Use Breathable Containers
Place your cured bars in a cardboard box or wrap them in paper, allowing them to breathe. Avoid plastic containers as they can trap moisture and lead to undesired softening.
Control Light Exposure
While the sunlight can be refreshing, it can also fade the color of your soap and change the scent over time. Keep your soap stored in a dark place to maintain its integrity.
Create a Soap Dish Sanctuary
If you’re storing the soap to use, consider a soap dish that allows for drainage. This ensures that any moisture from the soap doesn’t sit on the surface, which can shorten the lifespan of your creation.
Common Mistakes to Avoid
Cutting Too Early: As tempting as it may seem, don’t cut your soap before it has fully set. Patience pays off!
Skipping the Airflow: Avoid airtight containers and ensure proper airflow while your soap cures.
Storing in Humid Areas: Bathrooms might seem like they’re the right spot for soap, but the humidity isn’t doing them any favors.
Conclusion
Curing handmade soap can feel like an extra step you just want to skip, especially after investing all that time and effort into the soap-making process. However, embracing this step is essential to creating a product that not only looks beautiful but feels luxurious and lasts longer. Plus, knowing that you’re making something safe and nourishing feels great, doesn’t it?
So, as you embark on your soap-making journey, remember these tips and embrace the curing process. Soon enough, you’ll be lathering up with your very own handcrafted bars, enjoying every bubbly moment. Let’s be honest, there’s something incredibly fulfilling about using something that you’ve created, isn’t there? Now, go enjoy your beautiful soaps—they’re waiting for you!