
Embracing Creativity with Artisan-Inspired Soap Making
Imagine standing in a cozy little restaurant in Bellingham, WA, sipping a beautifully crafted cocktail adorned with vibrant colors and intriguing flavors. The thyme and peach puree swirl together, creating a masterpiece that’s as delightful to the eyes as it is to the palate. Now, what if you could take that inspiration and transform it into something equally beautiful and fragrant for your home? Welcome to the world of melt and pour soap making!
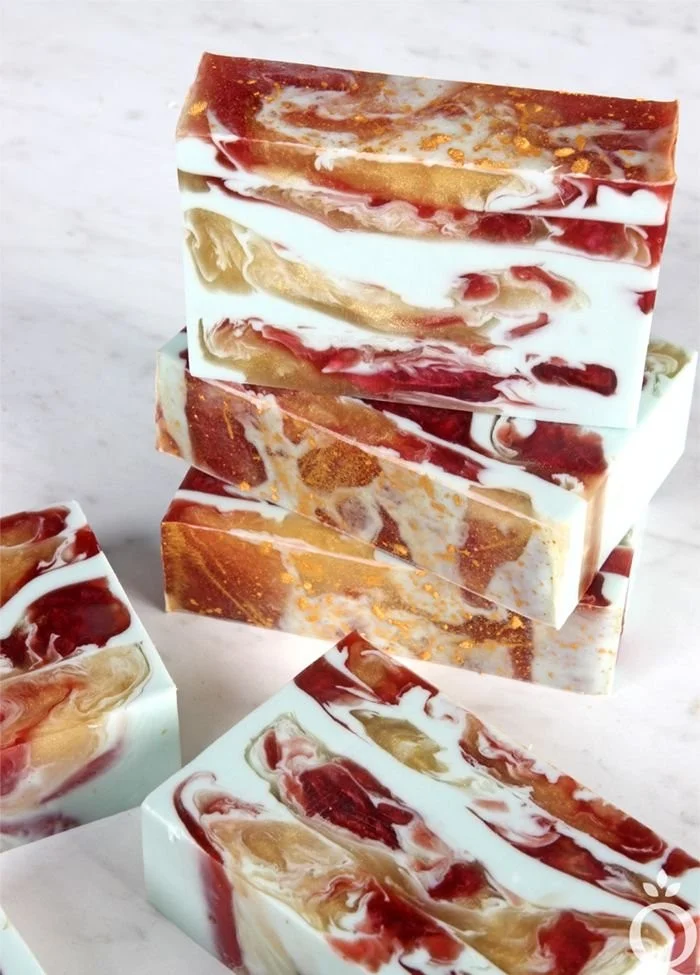
Here’s the truth: crafting artisan soaps can be just as creative and rewarding as mixing up those fabulous cocktails. With a little understanding of the soap-making process and the right tools, you’ll be whipping up colorful, fragrant bars that not only look gorgeous but can also elevate your self-care routine. So grab your apron, and let’s dive into this fun project inspired by the unique flavors of Bellingham!
Understanding Melt and Pour Soap Creating
Before we dive into the step-by-step process, it’s essential to grasp the basics of melt and pour soap crafting. Unlike traditional soap making, where you blend various lye and oils, melt and pour soap gives you the freedom to be creative without the complicated chemistry.
Why Melt and Pour?
- Safety: It’s perfect for beginners or those who want a no-fuss approach to soap making. There’s no handling of lye, which can be risky if not done correctly.
- Variety: You get a wide array of base options, from clear glycerin to shea butter, allowing for endless creativity.
- Customization: You can add your favorite scents, colors, and textures easily.
With these foundations in mind, let’s get practical about this fun crafting project.
Gathering Your Supplies
Essential Items
- Melt and Pour Soap Base: Look for bases that are made from natural ingredients. There are clear, white, and even goat milk options. Choose according to your preference.
- Colorants: Opt for skin-safe colorants. You might explore micas for a shimmery effect or natural plant-based colorants for subtlety.
- Fragrance Oils: Choose scents that inspire you. Think about the thyme and peach puree cocktails! Don’t forget to ensure they’re skin-safe.
- Thermometer: You’ll need this to check the soap temperature for proper layering.
- Spray Bottle of Isopropyl Alcohol: This is essential for ensuring layers stick together.
Optional Extras
- Molds: Silicone molds work great for easy removal. You can find fun shapes like flowers or geometric designs.
- Add-Ins: Consider additives like exfoliants (oatmeal, coffee, or seeds) or natural items (dried flowers, herbs) to elevate the texture of your soaps.
Step-by-Step Process for Irresistible Artisan Soaps
Step 1: Melting Your Soap Base
Let’s get started!
- Cut the soap base into small cubes; this helps it melt evenly.
- Place the cubes in a microwave-safe container. Heat in short bursts (30 seconds) until melted. Stir between heating to avoid overheating.
- Use your thermometer to check the temperature—aim for about 120°F to 140°F.
Step 2: Adding Color and Fragrance
Once your soap base is melted, you can elevate your soap bars with the artisan qualities reminiscent of your favorite cocktails.
- Color: Add your chosen colorant. Start with a small amount and mix thoroughly. If you want multiple colors, divide the mixture and adjust accordingly.
- Scent: Add your fragrance oil (typically 1 ounce per pound of soap base). Stir well, and please don’t be shy about experimenting!
Step 3: Pouring and Layering
Now’s the exciting part—layering your soap!
- Pour a small amount of your melted soap base into your mold and let it cool slightly until it thickens.
- Spray it with isopropyl alcohol to help the layers bond.
- Repeat the pour and spray process with different colors and scents. Each layer should be about an inch thick.
Tips for Perfect Layers
- Use contrasting colors but consider how they’ll look together, just like cocktails. Think of lighter colors on bottom and dark on top for a pleasing gradient.
- Pour gently to avoid disturbing the previous layers.
Step 4: Curing and Unmolding
- Let your soap cool completely. This usually takes a few hours or until the soap hardens completely.
- Once solid, gently remove the soap from the molds. You might run into some resistance with intricate designs, so be patient and gentle!
Step 5: Enjoy!
Congratulations, you’ve created artisan soaps inspired by those fabulous cocktails! Whether for your personal use or as heartfelt gifts for friends, your soaps are sure to impress.
Common Mistakes to Avoid
As with any creative project, there are a few pitfalls to watch for:
- Overheating the Soap: This can impact texture and color. Remember, it’s a delicate balance!
- Skipping the Alcohol Spray: It might seem trivial, but without that, your layers may not stick well together.
- Pouring Too Quickly: Give the previous layer time to cool properly. Rushing often leads to bubbles and uneven layers.
Quick Beauty Tips for Using Artisan Soaps
- Store Properly: Keep your soaps in a cool, dry place. This extends their shelf life and preserves fragrance.
- Use Exfoliating Soaps Sparingly: If you’ve added exfoliants, consider how often you want that scrubby effect on your skin.
- Gift Them: Wrap them beautifully with a personal note. Homemade gifts from the heart always feel special.
Bonus Self-Care Ideas
Crafting isn’t just therapeutic; it’s a fantastic way to connect with yourself. Here are some self-care activities you can pair with your soap-making experience:
- A Relaxing Bath: Treat yourself to a bath using one of your handmade soaps, surrounded by candles and soft music.
- Journaling: Record your creative journey—how you felt, what went well, and future ideas.
- Try Making a Spa Day: Incorporate your soaps into a full pampering routine, paired with a DIY face mask or a relaxing skin treatment.
Final Thoughts
Let’s be honest; your self-care moments are precious, and creating something beautiful for yourself can be immensely rewarding. Through the art of melt and pour soap making, you can shine a little creativity into your life while indulging in the vibrant essence of Bellingham’s artisan cocktails.
Celebrate the journey—each layer you pour is a step to feeling empowered, confident, and connected to your inner artist. So next time you sip your favorite drink, remember that creativity isn’t limited to the bar—it can flow into your bathroom too!
You’re not alone in this journey of self-care and creativity—let’s embrace the beauty within ourselves together. Happy crafting!