
Fragrance Oils for Candles: Top Picks for Hot and Cold Scent Throw
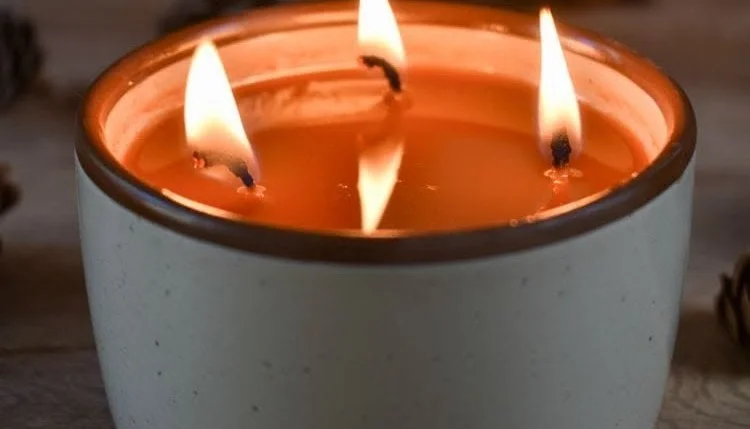
Making homemade candles can be one of the most rewarding DIY projects. Not only do you get to unleash your creativity, but you also fill your space with delightful fragrances that can evoke memories and set the mood for your favorite activities. In this article, we will explore the best fragrance oils for candles, highlighting those that excel in both hot and cold scent throw and smell heavenly.
Why You Will Love This Recipe
Incorporating the right fragrance oils in your candle-making process can elevate your final product significantly. You’ll discover how to choose oils that create an inviting atmosphere in your home. Moreover, with the step-by-step guide provided, even beginners can craft their homemade candles effortlessly. So, let’s dive in!
Ingredients
For basic candle-making, you’ll need the following ingredients:
- Wax: 1 pound (choose paraffin, soy, or beeswax depending on your preference)
- Fragrance oil: 1 ounce (look for oils known for robust scent throw)
- Dye (optional): As desired (for color but won’t affect scent)
Equipment
Before starting, gather the necessary equipment:
- Double boiler or a microwave-safe container
- Candle thermometer
- Stirring spoon or spatula
- Candle wick (with corresponding wick size for the wax type)
- Wick holder or adhesive tab
- Candle molds or containers (glass jars work well)
- Safety gloves and goggles
Step-by-Step Instructions
Prepare Your Workspace: Protect your area with newspaper or a drop cloth, ensuring everything is clean and organized.
Measure Your Wax: Using a kitchen scale, measure 1 pound of the wax of your choice.
Melt the Wax:
- Double Boiler Method: Fill the bottom pot with water and bring it to a simmer. Place the wax in the top pot and allow it to melt, stirring occasionally.
- Microwave Method: Place the wax in a microwave-safe container, heating in 30-second intervals until fully melted. Stir after each interval.
Check the Temperature: Once the wax is melted, use a thermometer to check the temperature. The ideal pouring temperature varies by wax type but usually ranges from 160°F to 185°F.
Add Fragrance Oil: Once the wax has reached the appropriate temperature, add 1 ounce of fragrance oil. Stir thoroughly for 2-3 minutes to ensure even distribution.
Color the Wax (If Desired): If you want to add color, now is the time to mix in your dye according to the instructions on the packaging.
Attach the Wick: While waiting for the wax to cool slightly, attach your wick to the center of your container or mold using an adhesive tab or hot glue.
Pour the Wax: Once the wax has cooled to around 120°F, carefully pour it into your prepared containers, leaving a little space at the top.
Secure the Wick: Use a wick holder or pencil to keep the wick centered as the wax hardens.
Cool the Candles: Allow the candles to cool completely, ideally for 4-6 hours, before trimming the wick to about ¼ inch above the wax surface.
Tips for Success
- Choose Quality Ingredients: High-quality fragrance oils give better scent throw and longevity.
- Test the Scent Throw: Make a small sample candle before making a large batch to see if the fragrance throws well.
- Patience is Key: Allow your candles to cure for a week for optimal scent performance.
Common Mistakes to Avoid
- Overheating the Wax: This can cause the wax to discolor and can affect the fragrance.
- Adding Fragrance to Wax That’s Too Hot: This can burn off some of the scent and diminish the effectiveness.
- Not Centering the Wick: This can cause uneven burning and soot.
Variations and Customization Ideas
- Scent Blends: Experiment with multiple fragrance oils. A combination of vanilla and lavender, for example, can create soothing, calming scents.
- Natural Additives: Consider adding dried flowers, herbs, or essential oils for a natural touch.
Storage and Shelf Life
Store your finished candles in a cool, dry place. Properly stored, they can last up to a year. Keep them out of direct sunlight to maintain their fragrance and color.
Safety Tips
- Always work in a well-ventilated area when melting wax and using fragrance oils.
- Wear safety gloves and goggles, especially when measuring out hot wax and dangerous additives.
- Never leave melting wax unattended.
Frequently Asked Questions
Q1: Can I use essential oils instead of fragrance oils?
A1: Yes, but essential oils generally have a weaker scent throw compared to fragrance oils, especially in candles.
Q2: How do I choose the right wick size?
A2: Wick sizing is often determined by the wax type and container size. Refer to a wick sizing chart for recommendations.
Q3: Why is my candle not burning evenly?
A3: This could be due to an improperly centered wick or the wax cooling too quickly. Make sure the wick is secured in the center.
Q4: How can I make my candle smell stronger?
A4: Increase the percentage of fragrance oil, but do so within the wax’s recommended limits.
Q5: Can I add color to my candle?
A5: Yes, use candle-specific dyes or crayon shavings, ensuring they are designed for candle-making.
Conclusion
Creating homemade candles is not only a delightful craft but also a chance to bring beautiful and rich scents into your home. With the right fragrance oils, your candles can have both impressive hot and cold scent throw, making your DIY projects even more rewarding. Remember to take your time and have fun experimenting with different scents and styles. So, gather your materials and let your creativity shine! Happy candle-making!